As I have mentioned multiple times before, taking classes and learning new skills is one of my favorite things. In just the past year I have learned or taken classes for pearl knotting, flower crown making, basket weaving, calligraphy, sewing, butter making, knitting, and sushi making. I feel like a nonfelonious Martha Stewart.

I’ve wanted to cross soap making off of the list for a long time, but it has been difficult to find a class that was hands-on rather than demonstration only. You learn a lot more (and have more fun) when you get to do things yourself. Fortunately, I found a class at Three Creeks Farm where not only could I get my hands dirty, but I could design my own soap.

We started with mixing the lye. This was the only part of the process we didn’t get to do on our own and our instructor, Seth, did it for us. Lye can be very dangerous and can burn your skin, blind you, and even kill you if ingested. Once it is combined with water it almost instantly reaches 180 degrees and therefore should not be handled indelicately. However, it is a vital part of soap making as its chemical reaction with the oils is what produces a solid soap (a process called “saponification”).
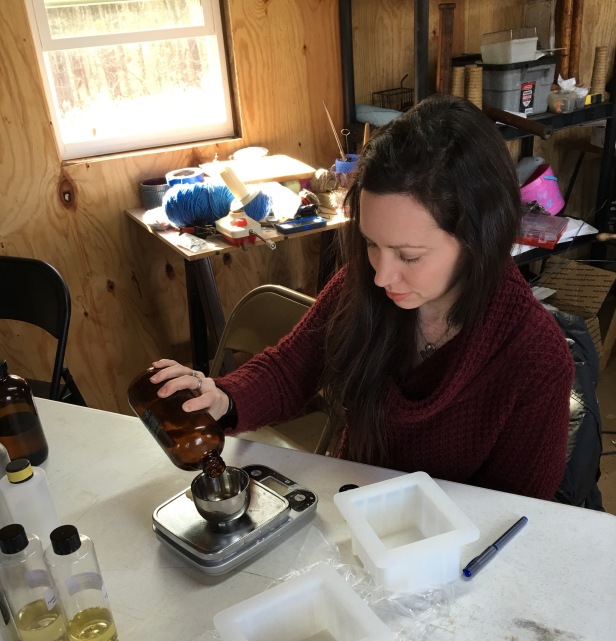
The first step was deciding what to put in our soap. I opted for coconut lemongrass for the fragrance oil, ground oatmeal and buckwheat for exfoliants, and a little bit of clover honey just for fun. Everything requires very exact measurements. After all, science.
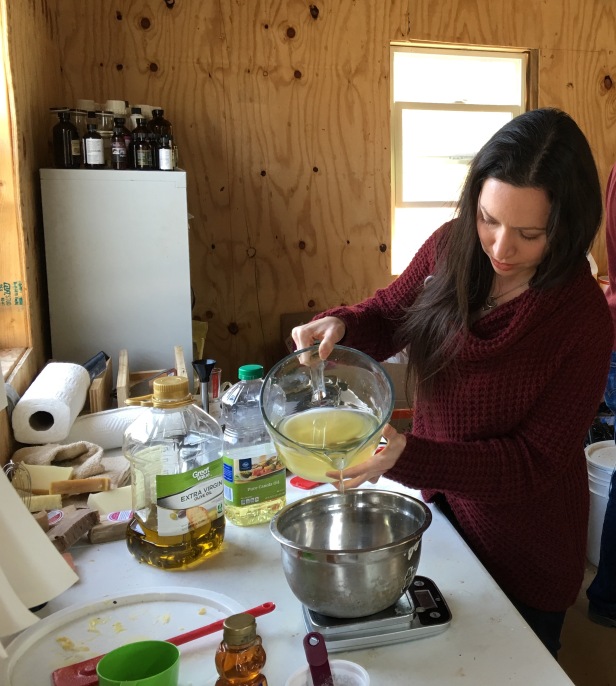
Once we selected our special ingredients (and set them aside to use later) we started to mix our oils. Our soap included 7 oz of olive oil, 6 oz of coconut oil (yum), and 1 oz of canola oil.

Once the oils were mixed it was time to put on my sexy safety goggles and add the lye and water to the oil mixture.

The lye tends to sink to the bottom of the oil, so I gave it a quick swish before mixing it.
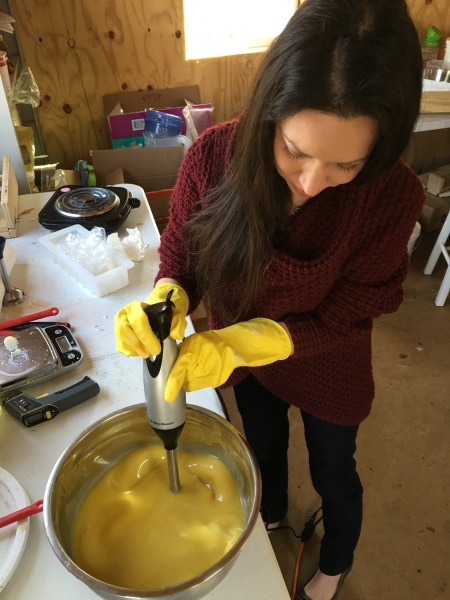
To thicken the mixture and help it along its journey to magnificent soapiness, we used an immersion blender to save time. It did not take long for the consistency of the oil and lye to start to change and become custard-like.

Then it was time to add the fragrance, oatmeal, buckwheat, and clover honey.

After some more blending, I poured the mix into a one pound mold where the soap began to harden over the next few hours. I was supposed to wait a week before removing the soap from the mold . . . I waited approximately 24 hours. I have never been accused of being patient. Fortunately it turned out ok.
I wanted a soap that was earthy, but sweet, and with a nice texture. I think I accomplished that. I still need to wait 2-3 weeks for the soap to cure through the saponification process before I can actually use it. (Waiting will be torture). Until then, every time I walk by the soap I pick it up and smell it. Mmmm!
Three Creeks Farm has an array of interesting class offerings including blacksmithing. Plus, they have a farm filled with alpacas, llamas, fainting goats, sheep, pigs, peacocks, guineafowl, and a very large mastiff named Hugo that you can pet and snuggle on . . . so you know I’ll be back.

Super clean post no lye!
Looks like a beautiful place to be, thank you for the excellent 52 things blog such a great break from real life! I enjoy every one….
LikeLike
Ha! And thank you for reading each week! I really loved their farm. I spent a lot of time just going around and petting all of the animals (especially Hugo), but I decided to spare you all from including all of the pictures I took in the post. It was a fun place all around!
LikeLike
Hi, Sara! I loved it too! It made me start wondering how soap works. I think I remember reading once that it has small ball bearing-like molecules (hence the slippery feeling you get) that get in and/or under dirt and grease making it easy to rinse off. I’m wondering now if that’s the chemical properties of lye, if lye is in all soaps, and if you might have gleaned any insight into that while on the farm? At any rate, as you can see, it was a very interesting and intellectually stimulating piece you provided! Thanks!
LikeLike